

Custom Gnome Scales: Build Pics!
Aug 4, 2013 10:13:54 GMT -8
CoRnhOlio, HunterHype, and 5 more like this
Post by willydigger. FB inFamous on Aug 4, 2013 10:13:54 GMT -8
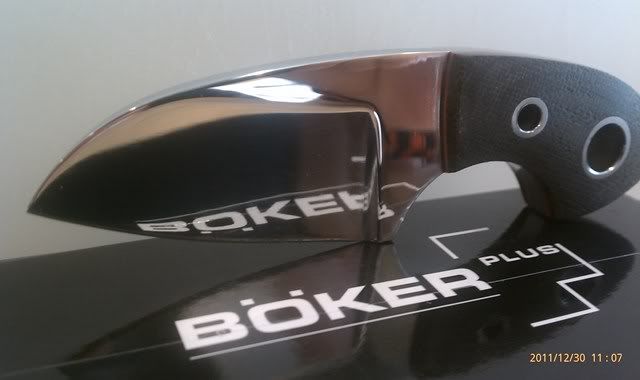
I've been big fan of the Gnome for a few years. I got my first Micarta a while ago and wanted to jazz it up. I decided to polish the blade and remove all the markings. One of the things that always bothered me was how the scales were mounted. It was an easy screw construction so I was forced to leave the scales on during the polishing. Micarta being micarta stood up well. Here are some old polished pics.

Over the last year or so, I started dabbling in making custom scales. It was a hobby in between bead-making. I did a few screw construction knives, but I always wanted to do my Gnome scales. Not long ago I discovered USN and eventually found the Vox sub-forum. Just for kicks I asked if anyone had already found a way to remove the scales and I got a response from VOX himself. Here is a link to that thread.
I decided to give it a try. Below are the pics. There might look a little out of order. I didn't take any pics until I got the first scale removed. Too excited I guess.
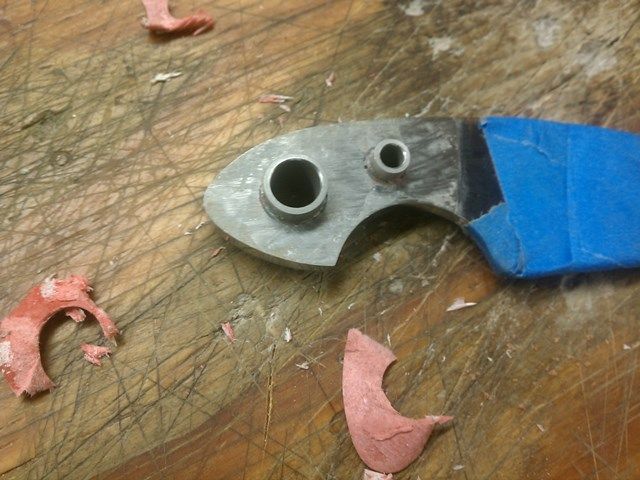
Here is the Gnome without a scale. The bushings look epoxied in as well. I didn't mess with them.
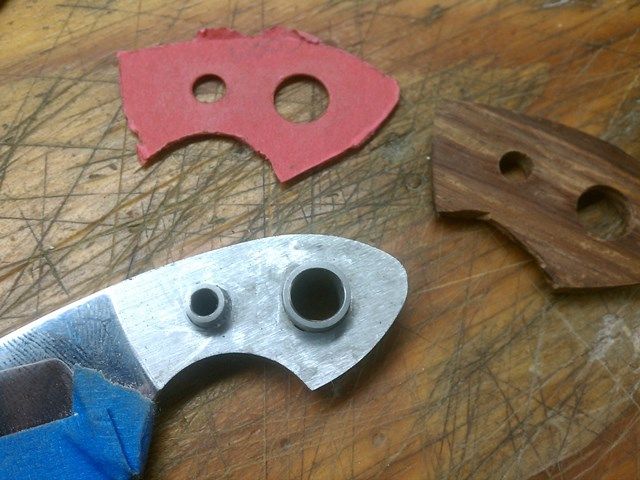
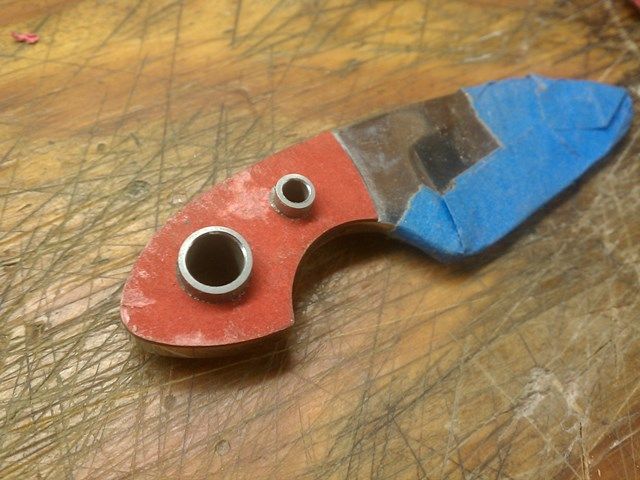
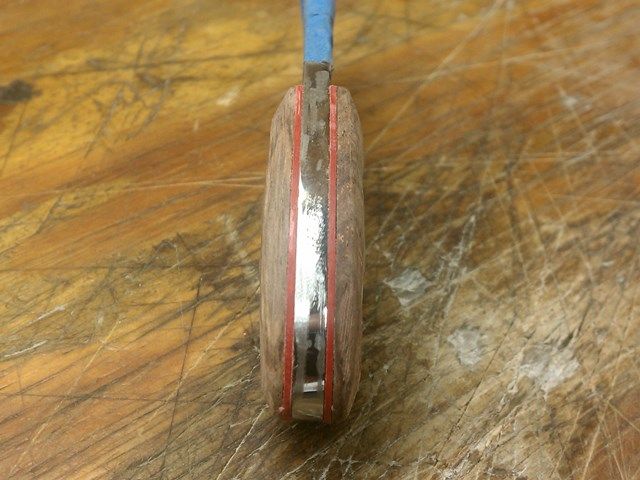
Here is the vulcanized liner. I chose red because I though it would go really well with the rich browns of the cocobolo.
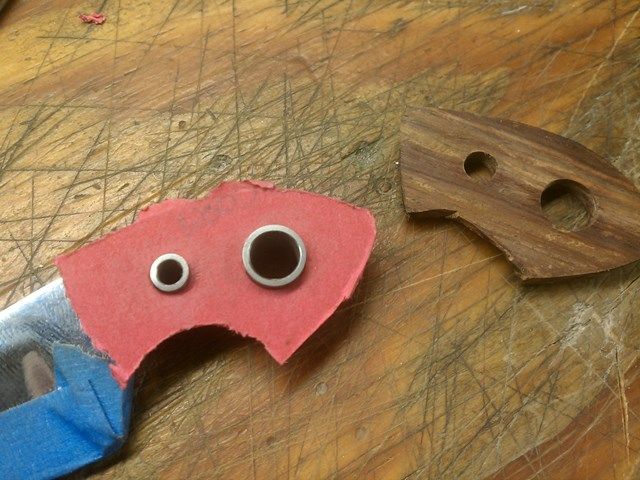
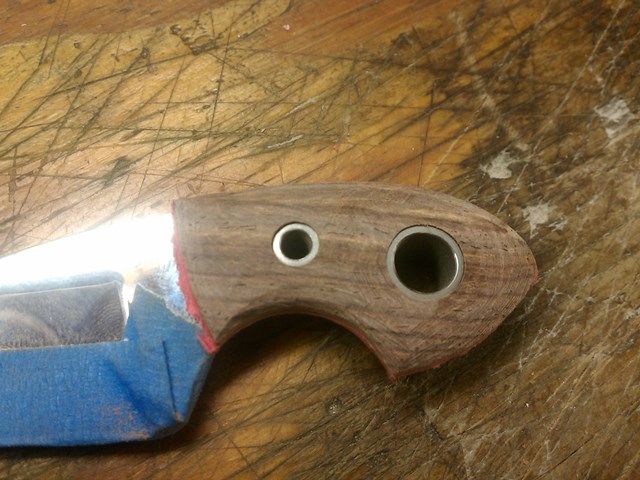
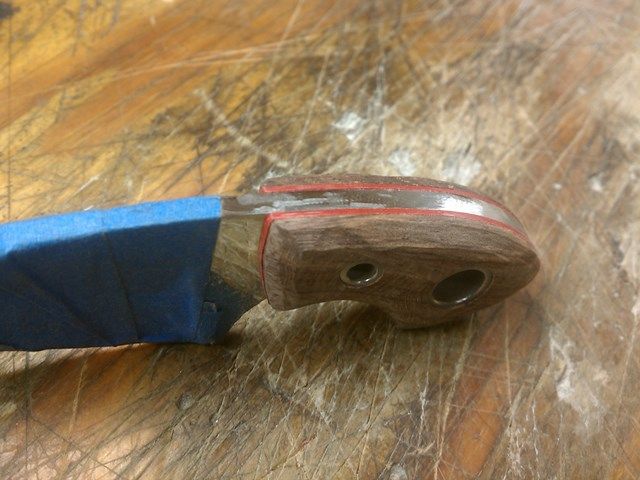
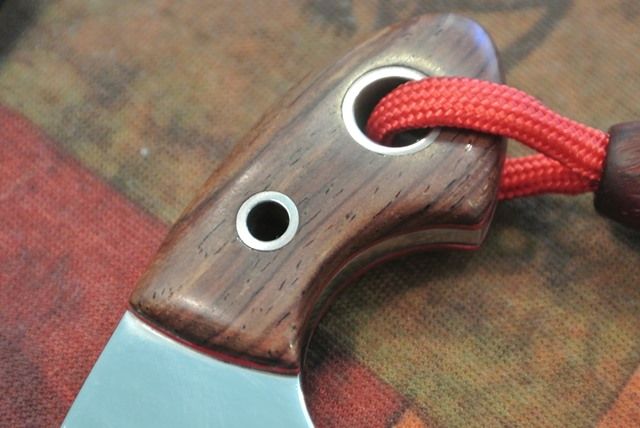
Here is the Gnome with the first scale removed and the holes drilled for the cocobolo replacement. My drill press isn't the best so a lot of this is eye-balling it. Fortunately I have a pretty exact eyeball.
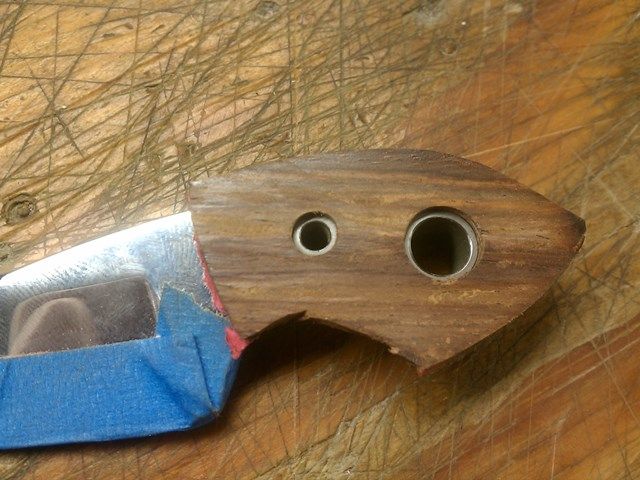
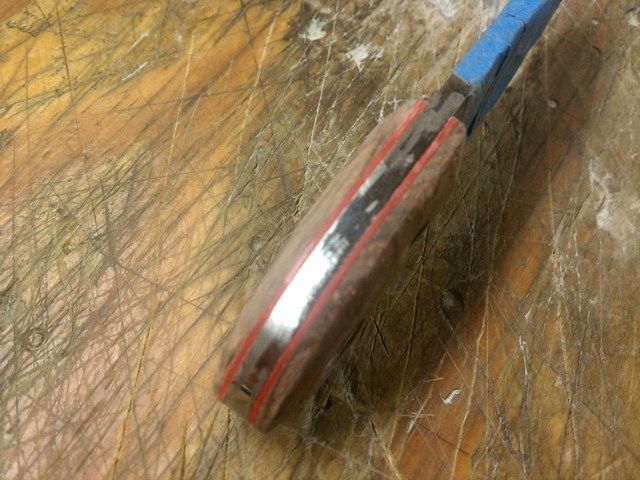
Here is the cocobolo side rough sanded and trimmed.
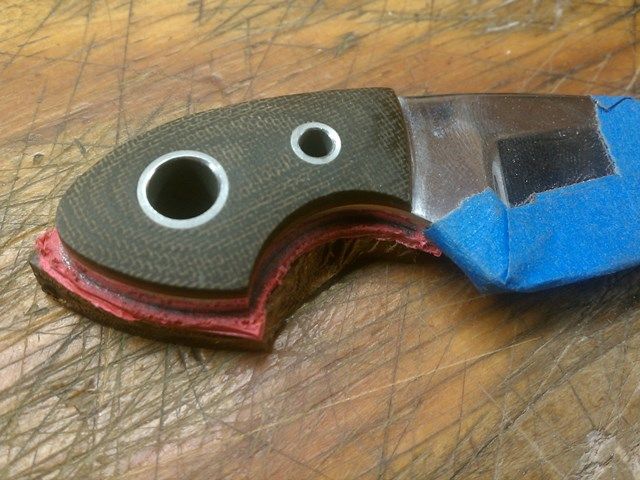
Here is the opposite micarta scale.
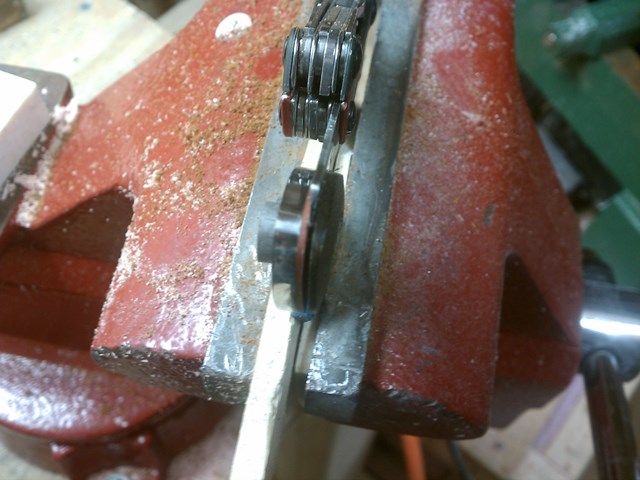
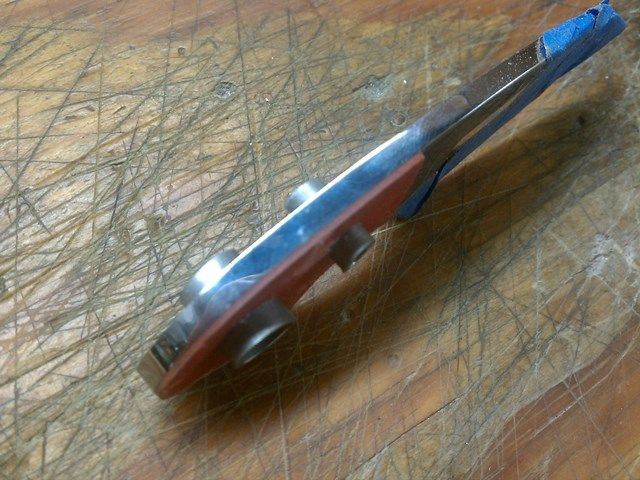
The Gnome in the vise I have my trusty Gerber Dime knife as the wedge between the micarta and the original vulcanized liner. With the first scale I removed I wedged the blade between the liner and the steel.
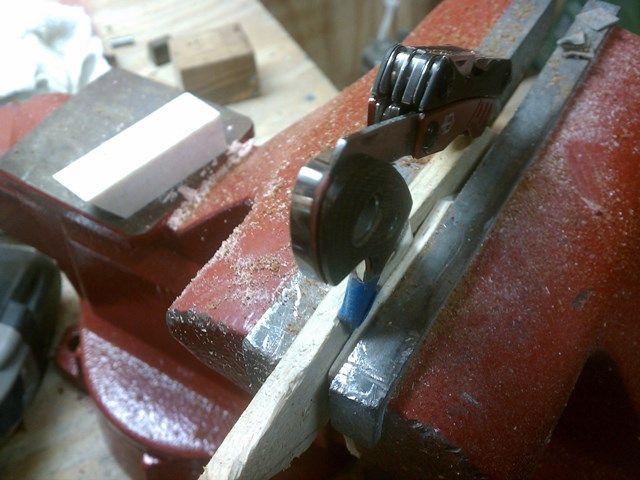
Alternate angle.
Here's a good tip. If you're lucky you should be able to get between the micarta and the liner. The adhesive at this area is much weaker than between the liner and the steel. If you don't plan to change the color of the liner you can reuse the factory liner. Below is the relatively undamaged factory liner.
Alternate angle. Totally reuseable.
Since I had already removed the other side and feared the reds wouldn't match perfectly, I had to remove the liner anyway. It is a PITA. The adhesive is strong. You can see all the scraping and shavings. I wiped the handle with some adhesive remover and got the remaining residue off.
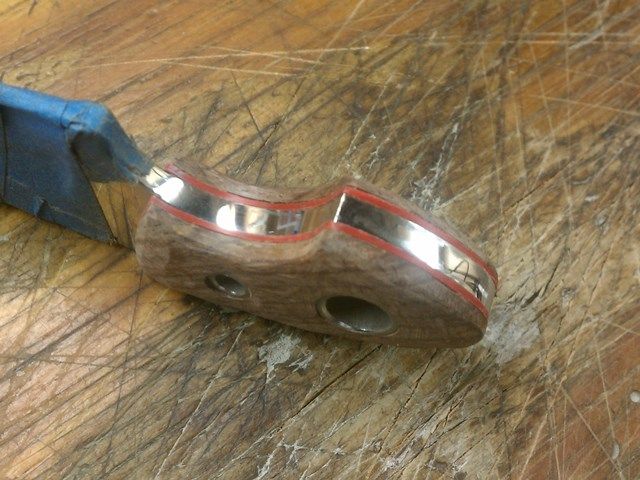
Here is the other scale trimmed and rough sanded.
I tore up the steel a little trying to trim down. Easy to fix. I could have spent more time protecting it, but I was too excited to get it done.
Alternate angle.
A pic of the liners.
Finished a little more.
Alternate liner pic.
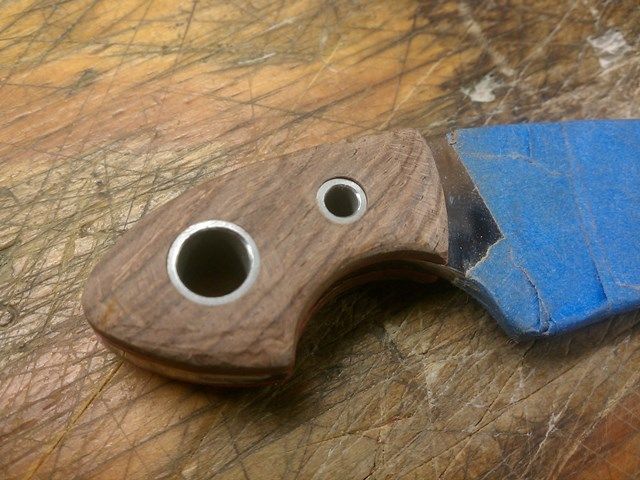
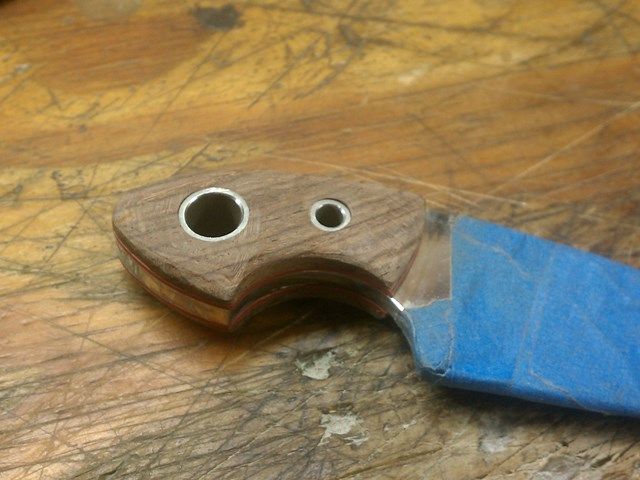
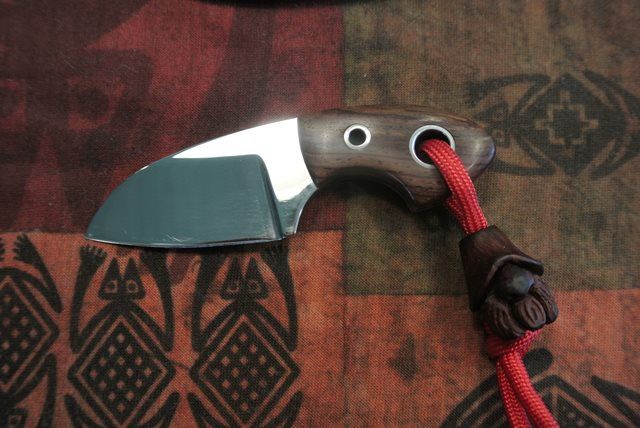
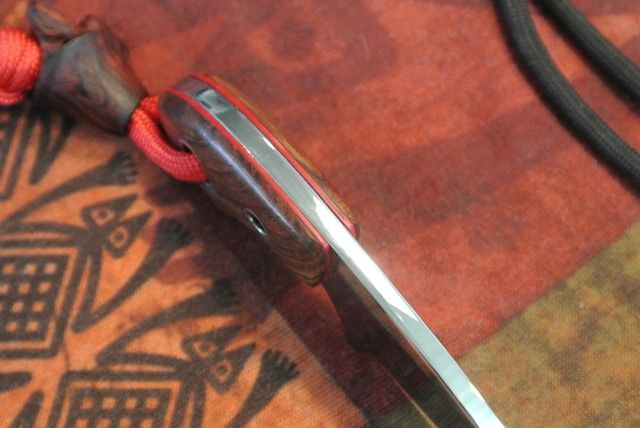
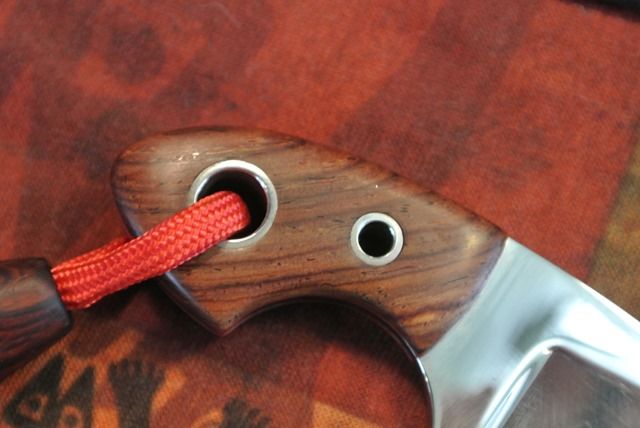
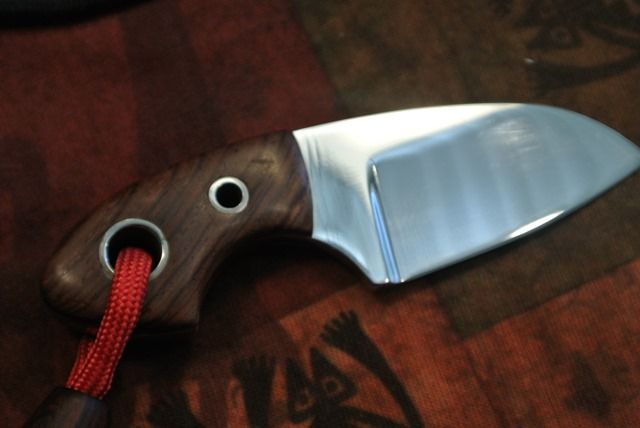
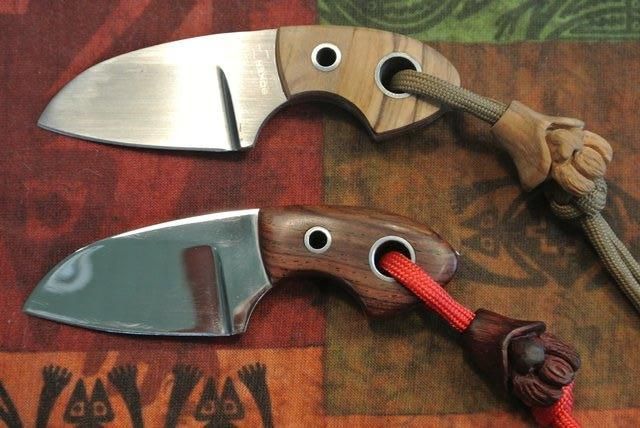
Here are the final shots. Now I have scales to make my cocobolo Gnome bead.
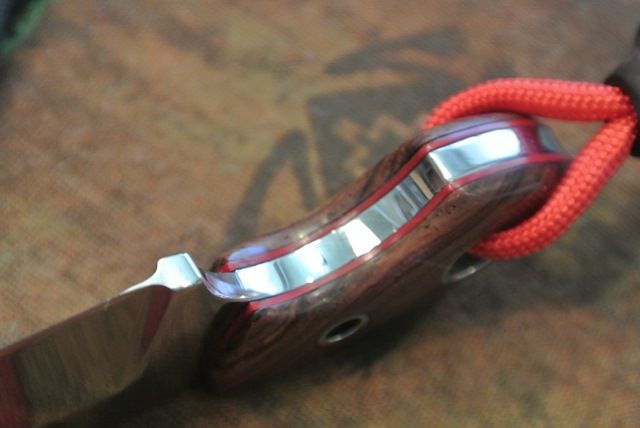
Repolished the steel.
I should have polished the bushing while it was apart. Hindsight.
Alternate pic.
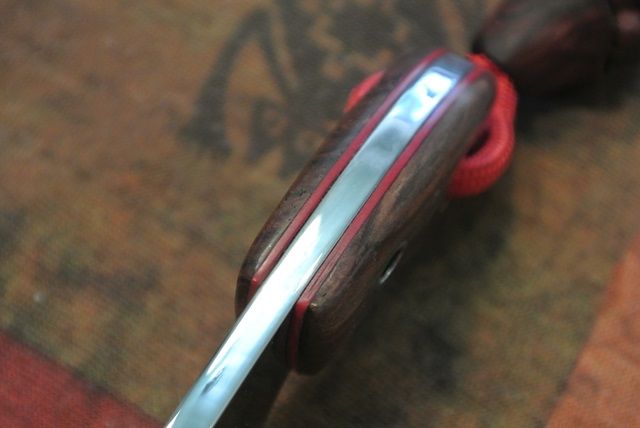
The fit is "close enough".
Fits in the Kydex sheath.
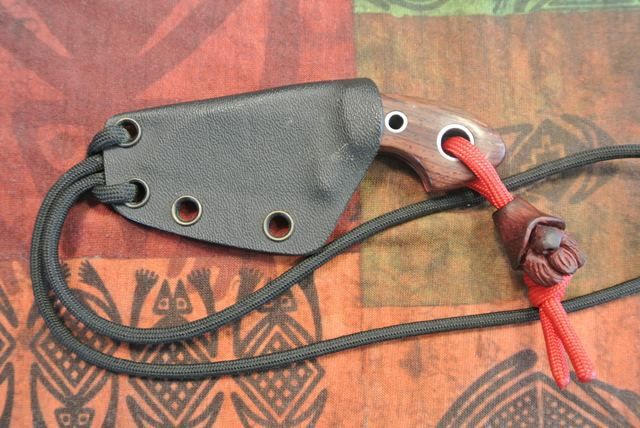
Hangin' with my Gnomies!
I used CA adhesive on the scales. I don't know how well it will work, but it's what I had. Seems to do well with my pens.
Over the last year or so, I started dabbling in making custom scales. It was a hobby in between bead-making. I did a few screw construction knives, but I always wanted to do my Gnome scales. Not long ago I discovered USN and eventually found the Vox sub-forum. Just for kicks I asked if anyone had already found a way to remove the scales and I got a response from VOX himself. Here is a link to that thread.
I decided to give it a try. Below are the pics. There might look a little out of order. I didn't take any pics until I got the first scale removed. Too excited I guess.
Here is the Gnome without a scale. The bushings look epoxied in as well. I didn't mess with them.
Here is the vulcanized liner. I chose red because I though it would go really well with the rich browns of the cocobolo.
Here is the Gnome with the first scale removed and the holes drilled for the cocobolo replacement. My drill press isn't the best so a lot of this is eye-balling it. Fortunately I have a pretty exact eyeball.
Here is the cocobolo side rough sanded and trimmed.
Here is the opposite micarta scale.
The Gnome in the vise I have my trusty Gerber Dime knife as the wedge between the micarta and the original vulcanized liner. With the first scale I removed I wedged the blade between the liner and the steel.
Alternate angle.
Here's a good tip. If you're lucky you should be able to get between the micarta and the liner. The adhesive at this area is much weaker than between the liner and the steel. If you don't plan to change the color of the liner you can reuse the factory liner. Below is the relatively undamaged factory liner.
Alternate angle. Totally reuseable.
Since I had already removed the other side and feared the reds wouldn't match perfectly, I had to remove the liner anyway. It is a PITA. The adhesive is strong. You can see all the scraping and shavings. I wiped the handle with some adhesive remover and got the remaining residue off.
Here is the other scale trimmed and rough sanded.
I tore up the steel a little trying to trim down. Easy to fix. I could have spent more time protecting it, but I was too excited to get it done.
Alternate angle.
A pic of the liners.
Finished a little more.
Alternate liner pic.
Here are the final shots. Now I have scales to make my cocobolo Gnome bead.
Repolished the steel.
I should have polished the bushing while it was apart. Hindsight.
Alternate pic.
The fit is "close enough".
Fits in the Kydex sheath.
Hangin' with my Gnomies!
I used CA adhesive on the scales. I don't know how well it will work, but it's what I had. Seems to do well with my pens.


 "
"